I recently came across a TikTok video of a beautiful, custom-made wooden box that plays a specific song at a button press. You can check out the original inspiration here.
As soon as I saw it, I knew exactly what I was making for my friend’s upcoming birthday. I decided to make this, but without utilizing any buttons — with music playing the moment you open the lid. It is such a thoughtful, personalized gift idea.
While I haven’t actually built the wooden box part yet (that’s the next phase of the project!), I just finished designing the electronics. I wanted to share my circuit design because I ran into a major hardware trap, and I made one change to the standard tutorials you see online to save battery life.
Beware the Non-Autonomous HW-247A Clone
Initially, my plan was to skip the Arduino entirely and keep the electronics as simple as possible. The original DFPlayer Mini has a “standalone” mode where you can trigger a song just by connecting the ADKEY1 pin to GND.
However, after wiring it all up, I got nothing but silence. After some deep diving, I found out the hard way that the module I bought was a newer knock-off (specifically the HW-247A V0.5.1). To cut costs, the manufacturers of this specific clone completely stripped out the standalone playback functionality. The ADKEY1 pin literally did nothing.
Because of this, using a microcontroller went from being an optional upgrade to a mandatory requirement just to get the chip to play music via serial commands.
The “Zero-Drain” Power Trick
Since I had to use an Arduino, I ran into a new problem: Arduinos left powered on 24/7 will drain your batteries in a matter of days, even when the box is closed.
I wanted this gift to be able to sit on a shelf for months and still work perfectly when opened. To solve this, I soldered the limit switch wires directly between the battery and the Arduino.
HOW IT WORKS
When the box lid is closed, it physically presses the switch, completely cutting the power circuit. The battery experiences absolute zero drain in idle mode. When you open the lid, the switch is released, power flows to the Arduino. It boots up, and the song starts playing automatically in a loop.
What YOU NEED
- Arduino Uno (Nano will work too)
- DFPlayer Mini (If you have a non-autonomous clone, this guide is for you!)
- MicroSD Card (4GB SDHC formatted to FAT32)
- Micro Limit Switch (With a metal lever)
- Small Speaker (you need a speaker under 3W. 4-ohms are recommended but a 0.5W 8-ohm speaker worked for me. You may also connect 2 speakers in parallel — I tried and it worked)
- Power Source (9V battery with a 9V Battery to DC Jack Connector. A 4x AA battery pack should work too)
- Jumper wires and a soldering iron
Circuit Diagram
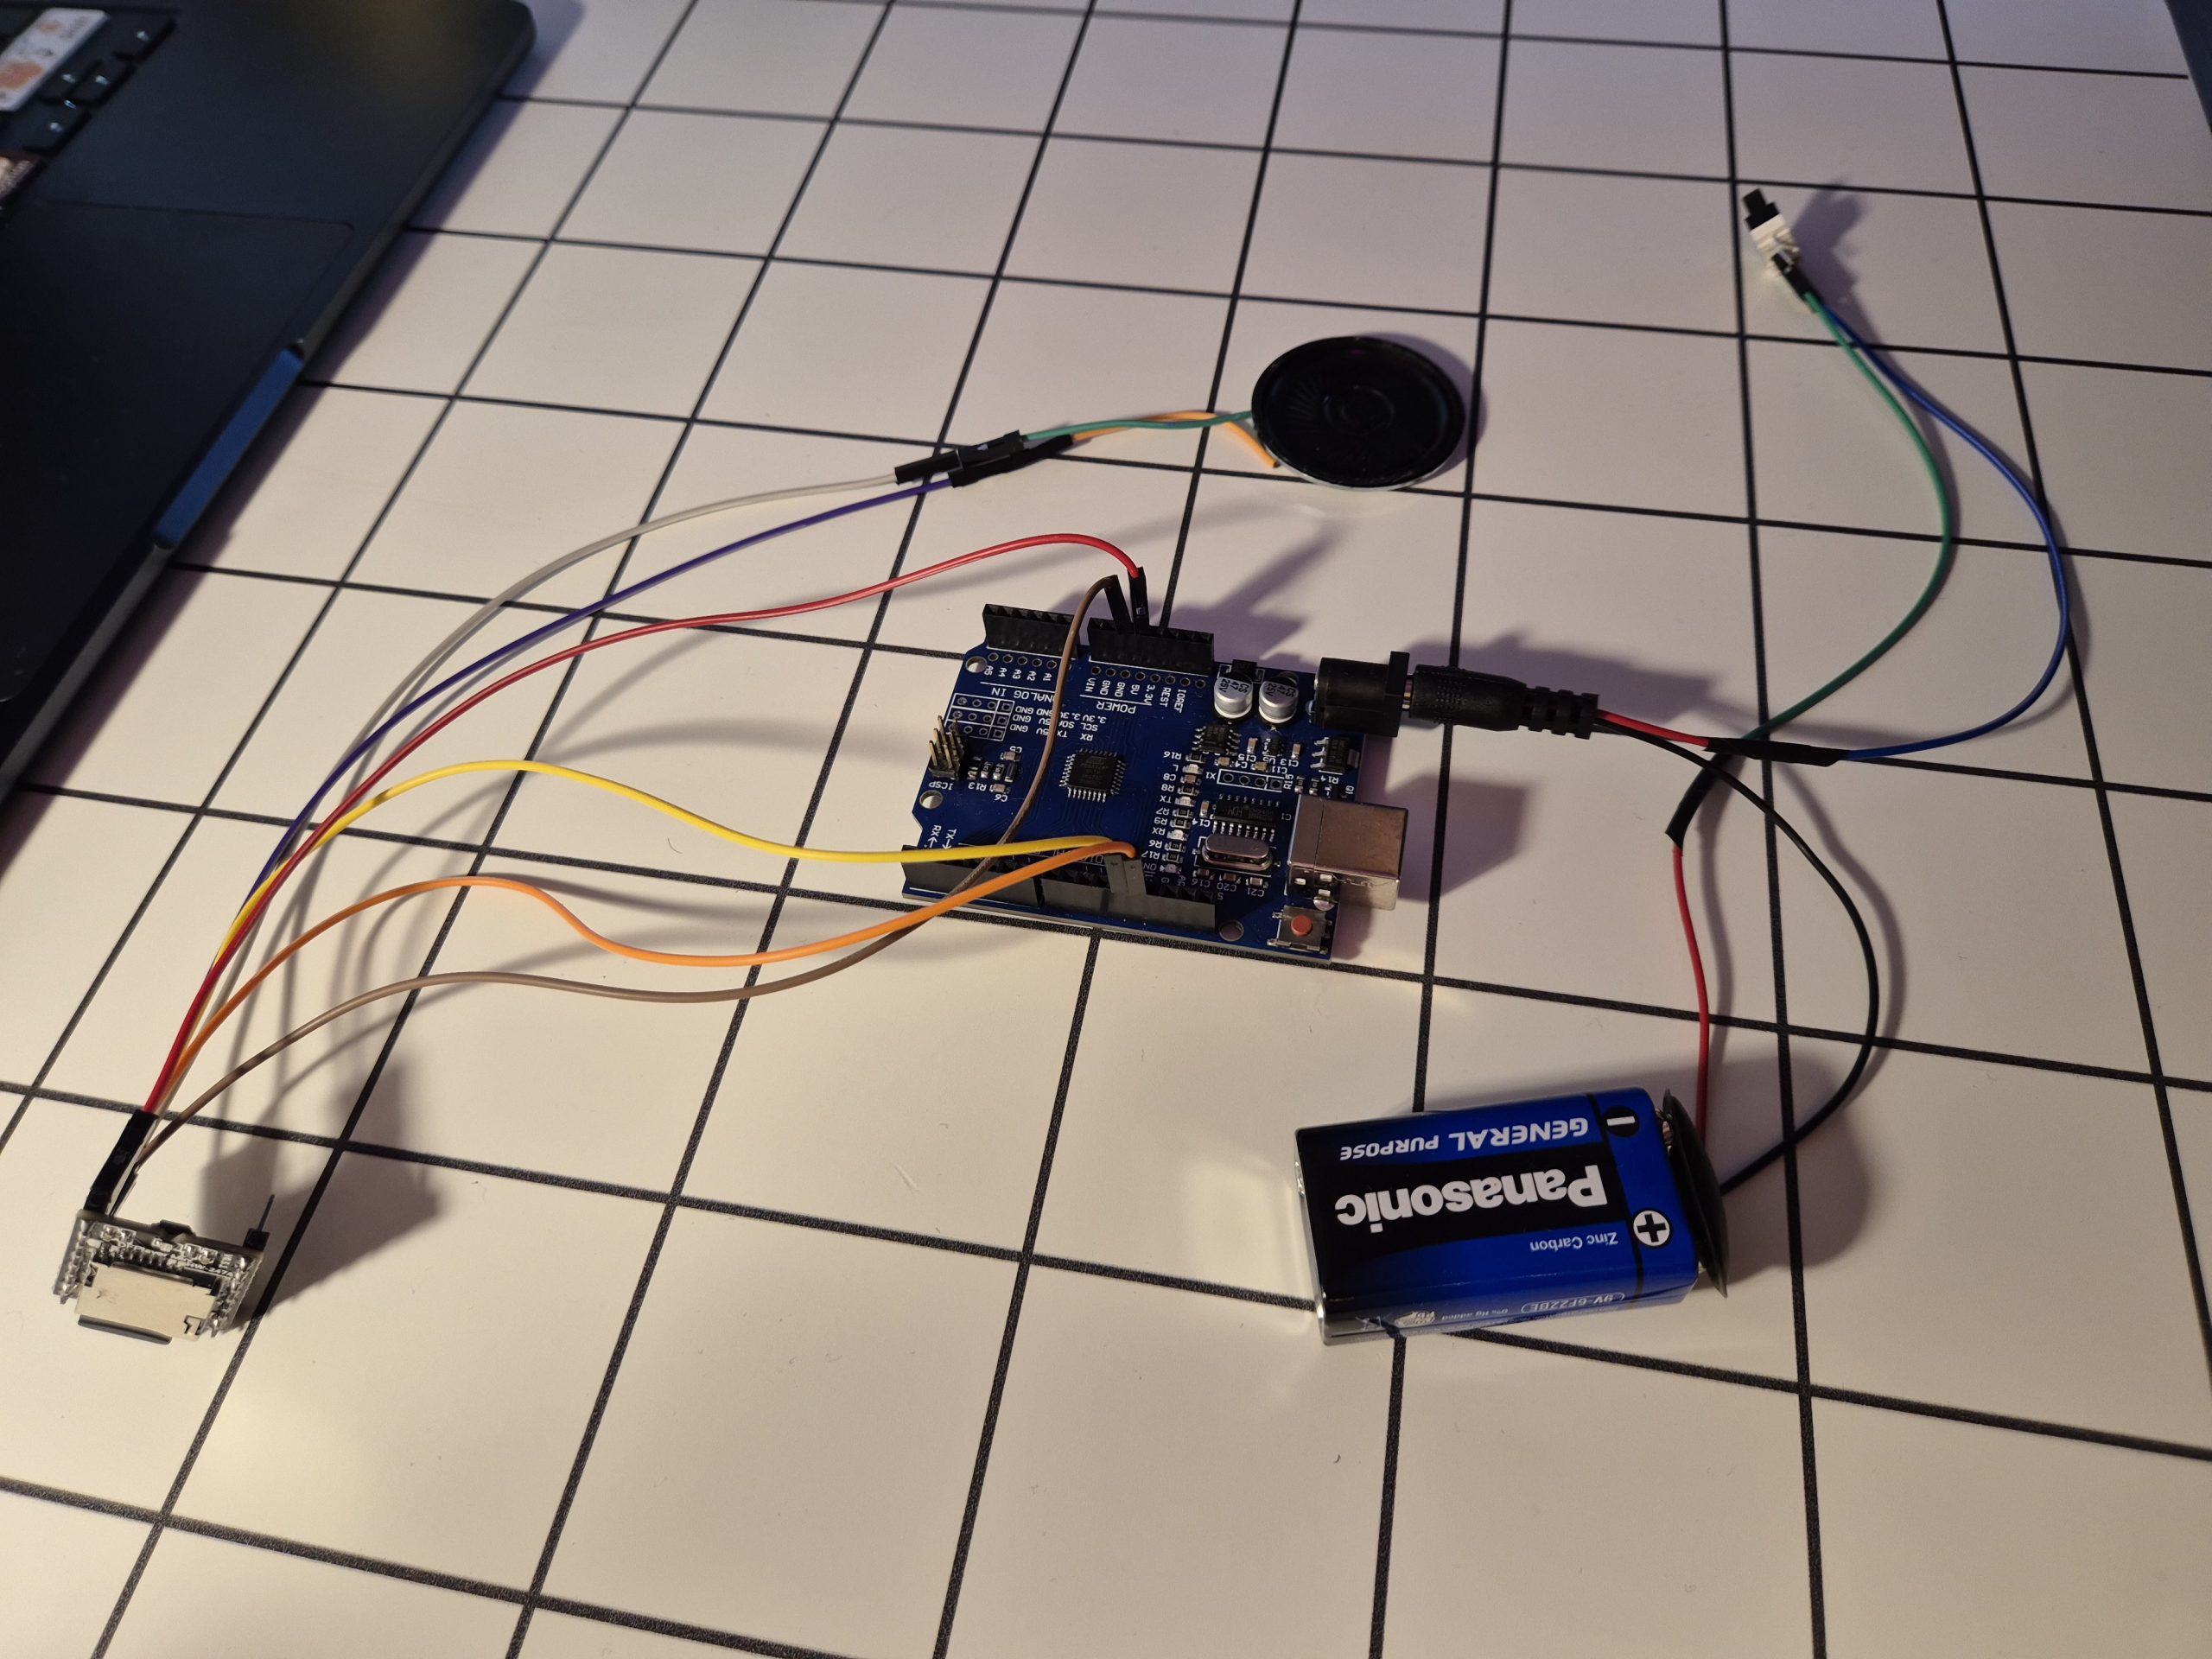
Build the circuit according to the diagram below:
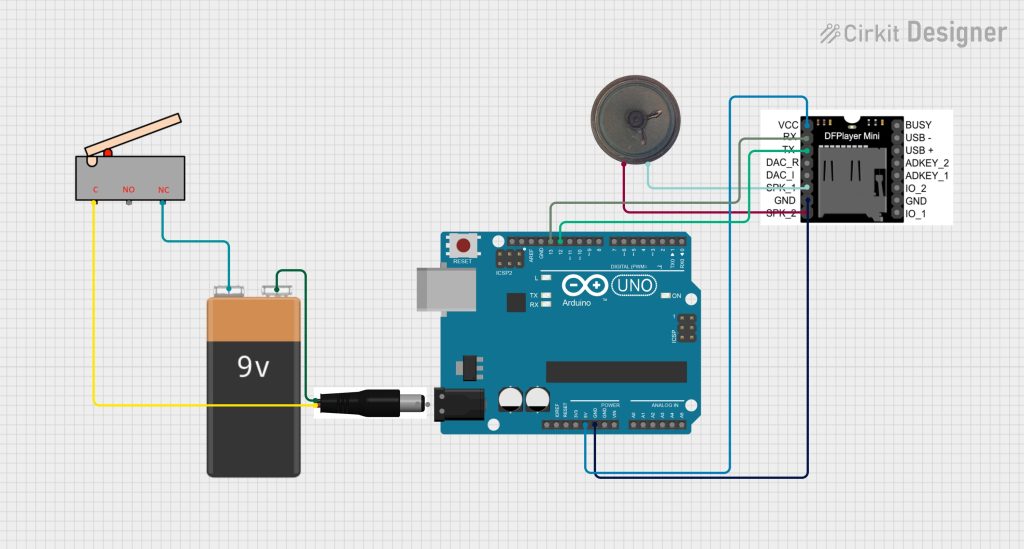
NOTICE: It’s recommended to place a 1k ohm resistor between the Arduino’s TX pin (Pin 12) and the DFPlayer Mini’s RX pin (Pin 2). This safely steps down the Arduino’s 5V signal to the 3.3V level expected by the DFPlayer, protecting the audio module from hardware damage.
I didn’t do that because yolo:D. I wanted to make this without using a breadboard, to keep the electronics in the box as minimal as possible (and I didn’t have a PCB prototype board at hand… well).
Correctly Formatting the SD Card
I learned that the clone chips are very strict about folder structure and file names. To ensure it works perfectly on boot:
- Format your MicroSD card to FAT32.
- Create a folder on the card named exactly
mp3(lowercase). - Place your song inside that folder and rename it to exactly
0001.mp3.
The Code
Because the Arduino loses power every time the box closes, the code is incredibly simple. It doesn’t need to constantly check a button state in a loop. It just boots up, waits 1.5 seconds for the MP3 module to initialize, sets a safe volume, and plays the song once.
You can find the code on my GitHub here.
What to do after assembling the circuit
Right now, my project is just a bare circuit. But as you can see in the video, the concept works flawlessly. When I press the switch (simulating the closed lid), everything turns off. When I release it, it boots up and plays. Just glue the switch on the left or right side inside your box. Then, glue a piece of wood from the top, so that the switch is pressed when the lid closes, and voilà:D